April 16, 2010
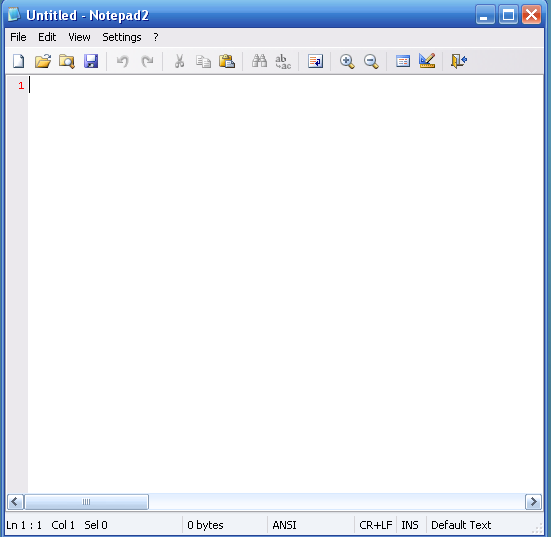
Replace Windows Notepad with Notepad2
 As Windows Notepad is fast and small it is used extensively to store notes, contact nos., email id etc. However there are some draw backs of this notepad. They are as follows.
What are some of the things I do not like about Windows Notepad:
- Does not handle large text files well.
- Does not show line numbers next to each line
- Does not support advanced search and replace features.
- Does not open text files from other platforms in a readable manner.
- Can't change the background or foreground colors.
- No good indent support
So what are our options? Replace it with a freeware notepad replacement. For this tutorial we will focus on Notepad2. Notepad2 is a freeware replacement to notepad with the following features:
- Customizable syntax highlighting
- HTML, XML, CSS, JavaScript, VBScript, ASP, PHP, CSS, Perl/CGI, C/C++, C#, Java, VB, Pascal, Assembler, SQL, Python, NSIS, INI, REG, INF, BAT, DIFF
- Drag & drop text editing inside and outside Notepad2
- Basic regular expression search and replace
- Useful word, line and block editing shortcuts
- Rectangular selection (Alt+Mouse)
- Brace matching, auto indent, long line marker, zoom functions
- Support for Unicode, UTF-8, Unix and Mac text files
- Open shell links
- Mostly adjustable
Providing a seamless replacement of notepad can be difficult, though, due to Windows XP's and Windows 2000/2003's Windows System File Protection (SFP) security feature. What this means is that when you replace a Windows system file with another file, SFP will automatically replace it with the original. I have though, provided some information below that should make it easier to do this replacement.
Replacing Notepad with Notepad2
The goal here is to make working with Notepad2 seem like you are working with the original Notepad by actually replacing notepad.exe with the notepad2 executable. To do this we will rename notepad2.exe to notepad.exe and copy it to the proper locations so as to overcome SFP as described above. Before we do anything, please enable the viewing of hidden system files.
Now we need to download Notepad2 from the following link:
Download NOTEPAD2
Save it to your hard drive and extract the files to C:\Notepad. Once extracted, rename notepad2.exe to notepad.exe. Now you should have a folder called C:\Notepad that contains the file notepad.exe.
When you have have followed the steps above you need to do the next series of steps. These steps should be done fairly quickly in order to beat SFP at its game. If you go too slow, then SFP may replace notepad.exe with the original Windows notepad. For those who do not want to deal with the instructions below, I have created two batch files that will do all these steps for you and almost always gets past the SFP problem. These batch files can be downloaded from the following link depending on your operating systems:
Notepad Replacement for XP
As long as you have notepad2.exe saved as C:\Notepad\notepad.exe, then the batch files above should be able to perform the replacement for you. After running the batch file you may get an alert from Windows saying one of your files (notepad.exe) was replaced with another file and asking if you want to restore it. You should press the Cancel button and the Yes button so that it does not replace the file. When done, feel free to delete your C:\notepad folder and hide your files again.
If instead you would like to do this manually, then below are the manual steps that the batch files does for you. These steps should be done in this exact order and as fast as possible to bypass SFP:
1. Make backup copies of notepad.exe in the following directories (Not necessary but good in case you want to roll back to the original notepad):
* C:\Windows\System32\notepad.exe
* C:\Windows\notepad.exe
* C:\Windows\system32\dllcache\notepad.exe
* C:\WINDOWS\ServicePackFiles\i386\notepad.exe
* C:\Windows\System32\dllcache\notepad.exe
2. Copy C:\Notepad\notepad.exe to all the directories listed above overwriting the notepad.exe that is there.
3. If Windows will issue an alert stating that the new notepad.exe is not the correct one and if you would like to correct. Press cancel at this prompt and then press Yes as we want to keep the new notepad replacement.
4. Delete the C:\notepad folder.
5. Hide your files again.
This will certainly work....
Give a Feedback after you have used it
January 24, 2010
How to Install, Configure, and Use Avast Antivirus
Downloading/Installation
Please visit this link: http://www.avast.com/eng/down_home.html and download the version that matches your language.
Once you have downloaded it locate the file that you just downloaded. The icon should appear like the image below:
![]()
Now double-click on the file to launch the installation of Avast!
Next you'll see this screen:

Click next.
You will get another window with the ReadMe File, just click Next, again.
Now you get the beloved Legal Agreement, just click I agree, and then click Next to continue. You will now see an image similar to the one below:

I would recomend using the "Typical" installation. Make sure Typical is selected then click Next.

Now if you selected "Minimal" you won't see "skins" here. After reviewing this for a second and confirming that what you have on your screen is similar to mine, click the Next button. (Note: the "Free Space" will vary from computer to computer. Since I have about 170 Gigabytes free that is why my Free Space is so large.)

After pressing Next, you will get the above message. Basically if you select Yes it will do a quick scan of your hard drive upon boot-up. This scan will start before you log-in into Windows. I recomend you select No, because even though this scan will only happen once, this scan can take quiet a while. It took almost an hour for my hard drive.

If you have Microsoft Anti-Spyware, or other similar program installed you may be prompted with a similar message. Click the Allow button to allow this change to take affect.

Now you have to restart your machine. I highly advise you to select Restart and then click Finish.
After you restart you will get a message about Avast! it will give you the general "Hello and Thank you for choicing our Product." Also after you restart you will notice 2 new icons in the bottom right corner of the screen.
![]()
The icon with the I is for the "Virus Recovery Database" (VRDB). What this does is virutally makes copies of the program you have installed and if one of them gets infected with a virus this will replace the files infected so the program function like before. The A is the On-Access Protection.
Very Important - after restarting, right click on the A in the taskbar and select Updating, the highlight Program.

You will get this popup after its done updating. If Avast! had to download anything for your computer you may get a message asking you to restart.
Now right click on the A in taskbar and click Start Avast! AntiVirus.

Click Program Registration and you will be taken to their website. Fill out the form and then check you e-mail. Once you get an e-mail from them (usualy about 1 minute after submitting the form) copy and paste the serial they provided into the highlighted box. Then click ok.

Now you will see this screen. Click the little hard drive like icon in the top right corner, below the X.
Click each icon on the right once until the options in the center read:
- Scan local drives: ON
- Scan removeable media: ON
- Scan selected folders: ON
C:\
Also adjust the slider at the top from Standard Scan to Thorough Scan, and make sure to check "Scan Archive Files."
Now click on the A on the middle left side and adjust the Resident Protection from Standard to High.
Ok now to set-up and configure the On-Access Protection.
- Right click on the A on the taskbar
- Click On-Access Protection Control

I recomend changing the default slide from Normal to High, depending on how fast your system is.
What makes Avast! unique is that it scans many parts of the system. It scans Instant Messenging, Internet Mail, Network Shield, Outlook/Exchange, P2P Shield, Standard Shield and Web Shield. So regardless of what you do on the computer you will be protected no matter what.
To schedule a scan: (from: http://forum.avast.com/index.php?board=2;action=display;threadid=3796)
- Go to Start > Programs > Accessories > System Tools > Scheduled Tasks
- Click (or double-click) on Add Scheduled Task
- In the wizard that appears click Next - a list of programs will appear
- Click Browse and navigate to C:\Program Files\Alwil Software\Avast4 (or whatever folder in which you installed avast!)
- Click (or double-click) on the file ashQuick.exe
- On the next screen give the task a name of your choice and choose how often you want it to run and click on Next
- On the next screen choose the appropriate scheduling options and click on Next
- On the next screen enter the user name and password for the Windows user you want the task to run as, then click on Next
- On the next screen check the box for the option "Open advanced properties for this task when I click Finish" , and then click Finish
- On the next screen, in the "Run" field you will see the path for the ashQuick.exe program. After the closing quote enter a space and type in the path(s) that
you want scanned. Multiple paths must be separated by a space and any paths that include a space in the path name must be in quotes. Here are a couple of examples:
"C:\Program Files\Alwil Software\Avast4\ashQuick.exe" C: E: - this will scan the entire contents of the C: and E: drives
" C:\Program Files\Alwil Software\Avast4\ashQuick.exe" "C:Program Files" E:Downloads - this will scan the contents of the Program Files folder on the C: drive and the Downloads folder on the E: drive, including all subfolders (Note the first path is in quotes due to the space in the folder name "Program Files")
- Click OK
- In the Scheduled Tasks window, from the menu, click on Advanced and choose "Start Using Task Scheduler"
- To test your newly created task, from the Scheduled Tasks window, right-click on the task's icon and choose "Run" from the popup menu. If the scan doesn't begin correctly you'll get an error message. The problem is most likely in the scan path (missing quotes or something like that.)
- Close the Scheduled Tasks window
I don't know if there is any way to pass other parameters to the ashQuick.exe program for various options like scanning depth, what to do if a virus is encountered, etc. If anyone has any info on how to pass other parameters please feel free to add the information to this thread.
Lastly, I wouldn't suggest using the screen saver scanner in conjunction with this scheduled scan, as they may end up running at the same time and cause conflicts.
December 29, 2009
NTFS or Fat32: Which should Be Chosen?
 A common questions when installing Windows XP on your computer is whether or not you should format your hard drives or Fat32. This is indeed a critical question to ponder over.
The specifications for both systems are as follows:
Fat32
- Use it if your hard drives is 32GB or less.
- Is slightly faster than NTFS, but not by much.
- Can be used by other Operating System If you plan on having multiple operating systems on your machine, you want FAT32.
- Should be used if your hard drive is greater than 32GB
- Has better compression allowing you to store more data.
- Has file security.
In generaly, with drive sizes being by default greater than 32GB, you should use NTFS. NTFS also gives you greater security on your hard drive to eliminate possible unauthorized access of your data.
On the other hand, if you are using Windows 95,98, or ME, NTFS is not an option so you must use FAT32. You will also want to use FAT32 when you have multiple operating systems on one computer.
I hope this clears up some of the confusion.
December 23, 2009
Backup Tool For Windows 7

To setup a backup in windows 7 follow the steps given below:
2. Go to tools tab and choose the option backup
3. In backup and restore window choose setup backup
4. Now Windows 7 will give you list of drives which can be used to store the backup file , you can choose network location also.
5. In the next step you can let windows to make automatic backup or custome choose the files which you want to backup by choosing option "Let me choose" , but if you'll let windows to choose then it won't backup Program Files,and anything formatted with FAT file system and files stored in recycle bin and any temp files that are 1GB or more.
6. After selecting the files you can select option to create an image of your local drive.
7. Save the backup settings and run the backup. Here you done wth backup.
8. Now if you want to restore it back simply double click on the backup file.
December 21, 2009
Youtube URL Tricks
View high quality videos
Youtube gives you the option to switch to high quality videos for some of the videos, however you can check if a video is available in high quality format by appending ‘&fmt=18′(stereo, 480 x 270 resolution) or ‘&fmt=22′(stereo, 1280 x 720 resolution) for even higher quality.
Embed Higher Quality Videos
While the above trick works for playback, if however you want to embed hig quality videos you need to append “&ap=%2526fmt%3D18″ and “&ap=%2526fmt%3D22″ to the embed url.
Cut the chase and link to the interesting part
Linking to a video where the real action starts at 3 minutes 22 seconds, wondered if you could make it start at 03:22? You are in luck. All you have to do is add #t=03m22s (#t=XXmYYs for XX mins and YY seconds) to the end of the URL.
Hide the search box
The search box appears when you hover over an embedded video. To hide the search box add ‘&showsearch=0′ to the embed url.
Embed only a part of Video
Just append ‘&start=30′ to skip first 30s of the video. In general you can modify the value after start= to the number of seconds you want to skip the video for.
Burn a Disc Image from a ISO or IMF file in Windows 7

This will show you how to use the built-in Windows Disc Image Burning Tool to burn a CD or DVD disc image from a ISO or IMG file in Windows 7.
- Place a blank unformatted CD or DVD into your CD/DVD drive.
- Click on the ISO or IMG file you want to burn a disc image with, then click on Burn disc image.
- Next to Disc burner, click on the drop down arrow and select the CD/DVD drive with the blank CD/DVD in it.
- Check the Verify disc after burning box if you want Windows 7 to verify the disc image afterwards, otherwise leave it unchecked.
- Verifying the disc will take a little bit longer for the disc image to be finished.
- you checked the Verify disc after burning box in step 4, then you will see this next.
- NOTE: You will not see this if you did not check the box. Instead you will see step 7.
- it is finished burning the disc image, click on the Close button.
- Remove your new CD/DVD image from the CD/DVD drive.
November 23, 2009
Get Rid Of Facebook Lite
 Facebook is one of the most widely used Social networking site where people share their thoughts, business, activities and meet new and like minded people. Once I was sharing my thoughts and activities on face books in Facebook then I could not stop myself from clicking the application Facebook Lite. I don't know why, I didn't like it. All options seemed to be disappeared and was feeling very uncomfortable.
 However, after some time I found a way to return back to previous Facebook interface which I was used to.
I would like to share this solution for the people who don't like Facebook lite.
Steps
- Scroll down to the below of the home page of your Facebook home page untill you can see the link "Feedback"

- Click that link, then you will be redirected to another page where you will find a feedback box and above that text box you will see the link "just click here"

- Then in no time you will be having your old but great FACEBOOK interface..


If you found this post helpful then please comment and let me know if it worked for you


