April 16, 2010
Replace Windows Notepad with Notepad2
 As Windows Notepad is fast and small it is used extensively to store notes, contact nos., email id etc. However there are some draw backs of this notepad. They are as follows.
What are some of the things I do not like about Windows Notepad:
- Does not handle large text files well.
- Does not show line numbers next to each line
- Does not support advanced search and replace features.
- Does not open text files from other platforms in a readable manner.
- Can't change the background or foreground colors.
- No good indent support
So what are our options? Replace it with a freeware notepad replacement. For this tutorial we will focus on Notepad2. Notepad2 is a freeware replacement to notepad with the following features:
- Customizable syntax highlighting
- HTML, XML, CSS, JavaScript, VBScript, ASP, PHP, CSS, Perl/CGI, C/C++, C#, Java, VB, Pascal, Assembler, SQL, Python, NSIS, INI, REG, INF, BAT, DIFF
- Drag & drop text editing inside and outside Notepad2
- Basic regular expression search and replace
- Useful word, line and block editing shortcuts
- Rectangular selection (Alt+Mouse)
- Brace matching, auto indent, long line marker, zoom functions
- Support for Unicode, UTF-8, Unix and Mac text files
- Open shell links
- Mostly adjustable
Providing a seamless replacement of notepad can be difficult, though, due to Windows XP's and Windows 2000/2003's Windows System File Protection (SFP) security feature. What this means is that when you replace a Windows system file with another file, SFP will automatically replace it with the original. I have though, provided some information below that should make it easier to do this replacement.
Replacing Notepad with Notepad2
The goal here is to make working with Notepad2 seem like you are working with the original Notepad by actually replacing notepad.exe with the notepad2 executable. To do this we will rename notepad2.exe to notepad.exe and copy it to the proper locations so as to overcome SFP as described above. Before we do anything, please enable the viewing of hidden system files.
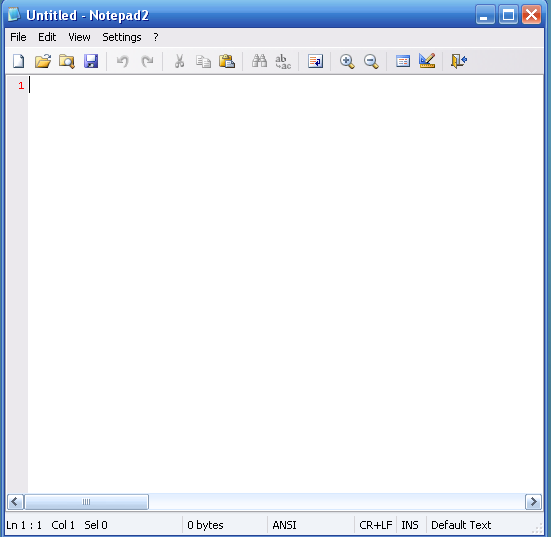
Now we need to download Notepad2 from the following link:
Download NOTEPAD2
Save it to your hard drive and extract the files to C:\Notepad. Once extracted, rename notepad2.exe to notepad.exe. Now you should have a folder called C:\Notepad that contains the file notepad.exe.
When you have have followed the steps above you need to do the next series of steps. These steps should be done fairly quickly in order to beat SFP at its game. If you go too slow, then SFP may replace notepad.exe with the original Windows notepad. For those who do not want to deal with the instructions below, I have created two batch files that will do all these steps for you and almost always gets past the SFP problem. These batch files can be downloaded from the following link depending on your operating systems:
Notepad Replacement for XP
As long as you have notepad2.exe saved as C:\Notepad\notepad.exe, then the batch files above should be able to perform the replacement for you. After running the batch file you may get an alert from Windows saying one of your files (notepad.exe) was replaced with another file and asking if you want to restore it. You should press the Cancel button and the Yes button so that it does not replace the file. When done, feel free to delete your C:\notepad folder and hide your files again.
If instead you would like to do this manually, then below are the manual steps that the batch files does for you. These steps should be done in this exact order and as fast as possible to bypass SFP:
1. Make backup copies of notepad.exe in the following directories (Not necessary but good in case you want to roll back to the original notepad):
* C:\Windows\System32\notepad.exe
* C:\Windows\notepad.exe
* C:\Windows\system32\dllcache\notepad.exe
* C:\WINDOWS\ServicePackFiles\i386\notepad.exe
* C:\Windows\System32\dllcache\notepad.exe
2. Copy C:\Notepad\notepad.exe to all the directories listed above overwriting the notepad.exe that is there.
3. If Windows will issue an alert stating that the new notepad.exe is not the correct one and if you would like to correct. Press cancel at this prompt and then press Yes as we want to keep the new notepad replacement.
4. Delete the C:\notepad folder.
5. Hide your files again.
This will certainly work....
Give a Feedback after you have used it
January 24, 2010
How to Install, Configure, and Use Avast Antivirus

Downloading/Installation
Please visit this link: http://www.avast.com/eng/down_home.html and download the version that matches your language.
Once you have downloaded it locate the file that you just downloaded. The icon should appear like the image below:

Now double-click on the file to launch the installation of Avast!
Next you'll see this screen:

Click next.
You will get another window with the ReadMe File, just click Next, again.
Now you get the beloved Legal Agreement, just click I agree, and then click Next to continue. You will now see an image similar to the one below:

I would recomend using the "Typical" installation. Make sure Typical is selected then click Next.

Now if you selected "Minimal" you won't see "skins" here. After reviewing this for a second and confirming that what you have on your screen is similar to mine, click the Next button. (Note: the "Free Space" will vary from computer to computer. Since I have about 170 Gigabytes free that is why my Free Space is so large.)

After pressing Next, you will get the above message. Basically if you select Yes it will do a quick scan of your hard drive upon boot-up. This scan will start before you log-in into Windows. I recomend you select No, because even though this scan will only happen once, this scan can take quiet a while. It took almost an hour for my hard drive.

If you have Microsoft Anti-Spyware, or other similar program installed you may be prompted with a similar message. Click the Allow button to allow this change to take affect.

Now you have to restart your machine. I highly advise you to select Restart and then click Finish.
After you restart you will get a message about Avast! it will give you the general "Hello and Thank you for choicing our Product." Also after you restart you will notice 2 new icons in the bottom right corner of the screen.

The icon with the I is for the "Virus Recovery Database" (VRDB). What this does is virutally makes copies of the program you have installed and if one of them gets infected with a virus this will replace the files infected so the program function like before. The A is the On-Access Protection.
Very Important - after restarting, right click on the A in the taskbar and select Updating, the highlight Program.

You will get this popup after its done updating. If Avast! had to download anything for your computer you may get a message asking you to restart.
Now right click on the A in taskbar and click Start Avast! AntiVirus.

Click Program Registration and you will be taken to their website. Fill out the form and then check you e-mail. Once you get an e-mail from them (usualy about 1 minute after submitting the form) copy and paste the serial they provided into the highlighted box. Then click ok.

Now you will see this screen. Click the little hard drive like icon in the top right corner, below the X.
Click each icon on the right once until the options in the center read:
- Scan local drives: ON
- Scan removeable media: ON
- Scan selected folders: ON
C:\
Also adjust the slider at the top from Standard Scan to Thorough Scan, and make sure to check "Scan Archive Files."
Now click on the A on the middle left side and adjust the Resident Protection from Standard to High.
Ok now to set-up and configure the On-Access Protection.
- Right click on the A on the taskbar
- Click On-Access Protection Control

I recomend changing the default slide from Normal to High, depending on how fast your system is.
What makes Avast! unique is that it scans many parts of the system. It scans Instant Messenging, Internet Mail, Network Shield, Outlook/Exchange, P2P Shield, Standard Shield and Web Shield. So regardless of what you do on the computer you will be protected no matter what.
To schedule a scan: (from: http://forum.avast.com/index.php?board=2;action=display;threadid=3796)
- Go to Start > Programs > Accessories > System Tools > Scheduled Tasks
- Click (or double-click) on Add Scheduled Task
- In the wizard that appears click Next - a list of programs will appear
- Click Browse and navigate to C:\Program Files\Alwil Software\Avast4 (or whatever folder in which you installed avast!)
- Click (or double-click) on the file ashQuick.exe
- On the next screen give the task a name of your choice and choose how often you want it to run and click on Next
- On the next screen choose the appropriate scheduling options and click on Next
- On the next screen enter the user name and password for the Windows user you want the task to run as, then click on Next
- On the next screen check the box for the option "Open advanced properties for this task when I click Finish" , and then click Finish
- On the next screen, in the "Run" field you will see the path for the ashQuick.exe program. After the closing quote enter a space and type in the path(s) that
you want scanned. Multiple paths must be separated by a space and any paths that include a space in the path name must be in quotes. Here are a couple of examples:
"C:\Program Files\Alwil Software\Avast4\ashQuick.exe" C: E: - this will scan the entire contents of the C: and E: drives
" C:\Program Files\Alwil Software\Avast4\ashQuick.exe" "C:Program Files" E:Downloads - this will scan the contents of the Program Files folder on the C: drive and the Downloads folder on the E: drive, including all subfolders (Note the first path is in quotes due to the space in the folder name "Program Files")
- Click OK
- In the Scheduled Tasks window, from the menu, click on Advanced and choose "Start Using Task Scheduler"
- To test your newly created task, from the Scheduled Tasks window, right-click on the task's icon and choose "Run" from the popup menu. If the scan doesn't begin correctly you'll get an error message. The problem is most likely in the scan path (missing quotes or something like that.)
- Close the Scheduled Tasks window
I don't know if there is any way to pass other parameters to the ashQuick.exe program for various options like scanning depth, what to do if a virus is encountered, etc. If anyone has any info on how to pass other parameters please feel free to add the information to this thread.
Lastly, I wouldn't suggest using the screen saver scanner in conjunction with this scheduled scan, as they may end up running at the same time and cause conflicts.
September 5, 2009
Convert FAT Partition To NTFS Partition Without Losing Any Data

NTFS is the standard file system of Windows NT, including its later versions Windows 2000, Windows XP, Windows Server 2003, Windows Server 2008, Windows Vista, and Windows 7.
NTFS supersedes the FAT file system as the preferred file system for Microsoft’s Windows operating systems. NTFS has several improvements over FAT and HPFS (High Performance File System) such as improved support for metadata and the use of advanced data structures to improve performance, reliability, and disk space utilization, plus additional extensions such as security access control lists (ACL) and file system journaling.
conversion of a partition from FAT or FAT32 to NTFS can be done by an inbuilt utility(convert.exe) in the Windows XP OS .So if you want increased security and faster data encryption,go ahead and convert to NTFS.
steps for conversion:
- Click start, click run, then type “cmd” to open the command prompt window
- In the command prompt window type: convert drive_letter: /fs:ntfs (For example,running the command convert E: /fs:ntfs would format drive E: to the NTFS format.You can convert FAT or FAT32 volumes to NTFS with this command.)
- After doing this the inbuilt utility will attempt to convert the drive for you.
Warning:
*This is a one-way conversion.Once the drive is converted to NTFS, you cannot simply convert it back to FAT or FAT32. It is required to reformat the drive or partition which will erase all data, including programs and personal files, on the partition.
*Make sure there is minimum 3% free space on hard disk drive partitions for proper conversion.
Note:
*Although the chance of corruption or data loss during the conversion from FAT to NTFS is minimal, it is best to perform a full backup of the data on the drive that it is to be converted prior to executing the convert command.
August 23, 2009
Hide Recycle Bin Desktop Icon

Step-by-step
We can remove/hide Recycle Bin icon from Desktop. Hiding Recycle bin icon from desktop won’t disable this feature, instead Recycle Bin icon will not be shown on desktop.
Why we need this?
Simple, we can hide almost every icon from the desktop, i.e. My Computer, My Network Place, My Document etc from start menu, i.e. shown below:

just select Show on Desktop to show/hide the desktop icon. But, this method can not be used to hide desktop icon of Recycle Bin.
To hide desktop icon of Recycle Bin, follow these steps:
1. Click on Start -
Run Type regedit and press Enter.

This will start the Registry Editor.
2. Search the following key
HKEY_CURRENT_USER\Software\Microsoft
\Windows\CurrentVersion\Explorer\HideDesktopIcons
NOTE: Before making any changes in the registry backup this item.
Right click on HideDesktopIcons key and select Export

Type a name and select Export.

3. Now click on ClassicStartMenu key and create a new DWord value with following details

Value Name ={645FF040-5081-101B-9F08-00AA002F954E}
Value Data= 00000001

4. Now Click on NewStartPanel key and create a new DWord value with following details:

Value Name ={645FF040-5081-101B-9F08-00AA002F954E}
Value Data= 00000001

Close the Registry Editor and Refresh the Desktop/Log off and Login again. Recycle Bin icon should not be showing on the desktop.
Tips
To Show the Recycle on Desktop, change the Value Data of the {645FF040-5081-101B-9F08-00AA002F954E} DWord key to 0.
Warning
This requires Registry changes, so please backup the appropriate registry key, before you proceed.
August 16, 2009
Get Windows XP Product Key From Your Installation CD

Its probably a nightmare if one loses his Window XP installation CD’s serial key when he needs to format his PC. PC normally has to be formatted when it suffers malware attacks, Virus attacks and by spyware. After, all these things happened one need to wash of his PC and get it go fast as it was going.
Well, have you lost your Windows XP installation serial key? No backups? What do you do now?
Perhaps you go erratic, worried and restless. You phone a friend, run to your neighbor etc. Stop doing all this as you have the matter of your pursue within your reach. Didn’t understand? Read below ….
I have a way just follow the below process and get the serial key from the XP CD itself
Steps:
- Insert the Installation CD into your CD / Drive Drive.
- Explore the CD and navigate to the i386 folder.
- Open the file UNATTEND.txt and scroll down to the last line.
- You will find your Windows XP Product key there.
This is the way to get the CD key from the installation CD probably
August 12, 2009
Save Your e-Mail Accounts From Being Hacked

Today in this post I’ll you all know how to prevent Email accounts from being hacked. Nowadays it’s a common complain that “my account has been hacked, what should I do?” The single answer to these two questions is “be careful from getting befooled” . It is neither easy to hack an email nor difficult to protect an email account from being hacked.
What are the reasons many people lose their accounts?
The answer is very straightforward. They don’t know how to protect themselves from being hacked! In fact most of the people who loose their email accounts are not the victims of hacking but the victims of Trapping. They loose their passwords not because they are hacked by some expert hackers but they are fooled to such an extent that they themselves give away their password.
Its mentioned below about some of the most commonly used online scams which fool people and make them loose their passwords. Solutions are mentioned too.
1. BY USING KEYLOGGERS
The other commonly used method to steal password is by using a Keylogger. A Keylogger is nothing but a spyware. If you just access your email account from a computer installed with keylogger, you definitely loose your password. This is because the keylogger records each and every keystroke that you type.
Solution:
Protecting yourselves from a keylogger scam is very simple. Just install a good anti-spyware program and update it regularly. This keeps your PC secure from a keylogger. Also there is a program called Anti-keylogger which is specially designed to detect and remove keyloggers. You can use this program to detect some stealth keyloggers which remain undetected by many anti-spyware programs.
2. WEBSITE SPOOFING
Website spoofing is the act of creating a website, with the intention of misleading the readers. The website will be created by a different person especially for the purposes of cheating. Normally, the website will adopt the design of the target website and sometimes has a similar URL.
For example a Spoofed Website of gmail.com appears exactly same as Gmail Website. So most of the people believe that it is the original site and loose their passwords. The main intention of spoofed websites is to fool users and take away their passwords. For this,the spoofed sites offer fake login pages. These fake login pages resemble the original login pages of sites like Yahoo,Gmail,Orkut etc. Since it resemble’s the original login page people believe that it is true and give away their username and passwords by trying to login to their accounts.
Solution:
• Always type the URL of the site in the address bar to get into the site.Never click on the hyperlink to enter the site.
• Never try to login/access your email account from the sites other than the original site.
3. ACCESSING YOUR EMAIL ACCOUNT FROM CYBER CAFES
If you access your email account from cyber cafes, then definitely you are under the risk of loosing your password. In fact many people loose their email account in cyber cafes. For the owner of the cyber cafe it’s just a cakewalk to steal your password. For this he just need’s to install a keylogger on his computers. So when you login to your email account from this PC, you give away your password to the cafe owner. Also there are many Remote Administration Tools (RATs) which can be used to monitor your browsing activities in real time.
This doesn’t mean that you should never use cyber cafes for browsing the internet. I know, not all the cyber cafe owners will be so wicked but it is recommended not to use cafes for accessing confidential information. If it comes to the matter of security never trust anyone, not even your friend. I always use my own PC to login to my accounts to ensure safety.
Please don’t forget to comment and give your feedback after going through this post…
July 20, 2009
Close Multiple Programs By One Click

It's difficult and often discouraging to have to open Task Manager and kill the processes by hand. It's very useful to be able to close applications from the command line, and even more useful to keep a batch file for it.
We have already learned how to open multiple file by using a batch. The process
Steps:
1. Open Notepad. Copy and paste the following into notepad:
@echo off
cls
TASKKILL /F /IM notepad.exe /IM mspaint.exe /IM calc.exe /IM excel.exe
pause
• This example kills every single occurrence of notepad.exe.
2. The syntax is somewhat simple /F stands for force, /IM kills by the process name, and taskkill supports * wildcards.
3. echo off, cls, and pause are just to make the batch script neater.
4. Go to File, and Save As.
5. Where it says "Save as type:", select All Files, and at File Name, type "myUtilityKiller.bat".
• The name doesn't matter, only the .bat matters.

6. Now double-click the .bat file, and all occurrences of notepad.exe, mspaint.exe, calc.exe, excel.exe/ whatever you have added will disappear.
Tips:
• You can add "pause" onto a new line so that you can see the output.
• You can also use wildcards to specify process to kill such as :
TASKKILL /FI "IMAGENAME eq n*"
This will close all processes beginning with n.
• To Kill process running on different system use the following syntax
TASKKILL /S system /U username /P password /FI "IMAGENAME eq note*"
Such as:
TASKKILL /S 192.168.0.14 /U administrator /P xyz /FI "IMAGENAME eq note*"
This will terminate all process matching the wildcard on system 192.168.0.14 [IP address of the system]
Warnings
• It closes the process, and closing the wrong process may cause system instability.
July 17, 2009
Hide Your Data In Image

There are many encrypting techniques which are used. Encryption of files having data is used to get it transmitted through internet safely to the recipient. When a file is transmitted via mail there is a great possibility of that file to get hacked. Unauthorized access of any file is prevented through the process called encryption.
Well, I have a great way to encrypt any file or multiple file within an image. Does it not sound amazing? To me it did. when I came to know this method I just spun off from my chair. I am sure that you all gonna like it.
To get this encryption done we need to use DOS command prompt using /b to covert any type of file to an image. The file may have extensions like file1.txt, file2.mp3 and file3.wav etc. So we must look at the process instead of narrating the Jargon.
suppose you want to encrypt the files: file1.txt, file2.mp3 and file3.swf . Put all this files in a folder namely “sample”. We now need a compressing s/w like Winrar.
Thereafter, all we need is to compress the files and name it as “Test” (say). Put this folder in any drive. suppose it is kept in drive D:/. Now its required to open the DOS command prompt. ( type cmd in run dialogue box ). The default directory must be changed to the directory which is containing the stuffs to be encrypted. Here, it’s the folder “sample” in drive D:/.
The DOS command would look like D:\Sample>
Now, use a image say “image1.jpg” to hide the data inside it. This image must be kept in the drive which contain the folder “sample”.
Now there is a small operation which will encrypt your data by hiding it in the image “image1.jpg” type the following in DOS prompt ( the blue part)
D:\sample>copy /b Test.rar + image1.jpg encrypted.jpg
Single.rar is our combined files in rar format and image1.jpg is the image file where we are going to hide the sample1.rar file. Test.jpg (you can use any name of your choice) is the resultant image file that contains the rar file.
The switch ‘/b’ indicates that we are performing the binary copy.
Now, everything is done. Using this method we can hide virtually any file type like rar, swf, mp3, txt, exe etc within an image. The image file may be a jpg, png, bmp or gif.
Advantages:
- Supports hiding any file type within an image.
- No additional tool/software is required.
- Less time and resource consuming.
- You can hide an exe file into jpg and send it through e-mail .
Disadvantages:
- It is not a good method for encrypting any important data.
- The resultant image does not open when a file of higher size is hidden inside it.
XP Tricks & Tips

Remove MSN Instant Messenger Program
Some of us just don't like to use this IM program. I myself have looked in the Add/Remove Program panel and can't find any way to remove it there. I found out how to do it with a little research.
Just go to Start->Run and type in rundll32 setupapi,InstallHin fSection BLC.Remove 128 %SystemRoot% \INF\msmsgs. inf and hit ENTER. Do a copy and paste to avoid typographical errors.
Remove Internet Explorer Completely - All version of Windows
Microsoft said that removing IE may make Windows unstable because it has key components that makes Windows function properly. Well, there is a way to remove it completely. Go to this site and get IEradicator. Many people have used it before and removed IE with no problems afterwards.
Shutdown Windows Faster
All versions of Windows have the same problem. It usually takes a little longer to shutdown when you have the Exit Sound enabled. To disable this go to Start->Settings->Control Panel->Sounds and Audio Devices->Sounds. Scroll down and look for Exit Windows . Click on it once and then under Sounds, choose None. You should see faster shutdown times.
Clean out files in Prefetch Folder
There are files located in the Prefetch folder (C:\Windows\Prefetch ) that you may safely delete. These files are usually left there by other programs that were using. You can either manually delete them or use this batch file that I created to do it.
All you need to do is unzip the file called prefetch.bat into your Desktop and then double click on it. You will see the command prompt come up shortly and disappear. That's it.
Remove temporary files from Temp Folder
You may have noticed that .tmp files appear in the Temp folder ( C:\Windows\Temp). You may delete these files. Since these files might be accessed by another program, it's a good idea to delete these
when you don't have any programs open.
It's best to do this right after you login to ensure that no programs are using it. If you don't want to bother going into that folder every time to delete it, you can download xp_downloads. zip which contains a file called del_temp.bat . Just extract that file and double click on it to run it.
Add programs/folders to SendTo menu
When you right click on a file/folder and choose SendTo, you will get a list of programs/folders to send it to. Let's just say that you want to add or delete one of your own programs/folders. This could be accomplished very easily. Just navigate to C:\Documents and Settings\your_ username\ SendTo.
In this folder you may add or delete any program/folder shortcuts. All you need to do is right click on the program you want to add, and drag and drop (choose Create Shortcuts Here) it into the SendTo folder.
Make XP stop displaying zipped files as folders
In XP, zipped folders could be viewed just by opening up the file. If you have a third party zip program that you want to use instead of the built in one by XP, you can stop XP from displaying the zipped files as folders. This may also be useful for those who are on a slow PC and don't want to open zip files using
XP's built in zip program.
To disable this in XP, go to Start->Run and type in regsvr32 /u zipfldr.dll. You may just copy and paste the command into the Run menu. If you want to undo it, just type in regsvr32 zipfldr.dll. Zip away.
How to Create a Password Reset Disk
Windows XP allows you to create a password reset disk, just in case you forget the password and can't login. This is only for computers that are not on a domain. Those that are on a domain may or may not work the same way.
Go to Start->Control Panel->User Accounts and click on your username. Under Related Tasks on the left pane, click Prevent a forgotten password . A wizard will show up. Click next and then insert a floppy disk into your floppy drive and choose to save the reset disk on the floppy.
Enter your current password and then click Next and Finish. The floppy will now contain your encrypted password. If you forget your password, you can just use the Password Reset Wizard to create a new one. Just make sure to create another reset disk once you changed your password. So if you forgot your password and changed it to a new one, create another reset disk by repeating the above procedure again.
Set User Logon Hours
You can restrict a certain user to only use the computer at a certain time interval. Let's say you have a username called Bill and you want Bill to access the computer only from 9AM - 9PM from Monday through Friday.
You can do this by going to Start->Run and type in net user Bill /time:M-F,9am- 9pm. For 24-hour time, you can replace the time with 09:00-21:00 instead. This will only allow the user to login during those hours on those days.
Disable XP Messenger Service
Disable the messenger service built into Windows XP to prevent ads or other popups from coming up when using Outlook (and maybe even Outlook Express). Anyway, just disable it for better performance.
To disable it, right click on My Computer->Manage->Services and Applications->Services and right click on Messenger and choose Stop. This will stop the service. There may be cases when the Messenger Service is required for some programs to run properly, so if that's the case, I would set it to Manual instead of Stop .
Customize SendTo Menu - All versions of Windows
Have you ever wanted to use some other program to open up a certain file but had to go through My Computer->Program Files and then click on the program's folder and then the program itself. You can open a file with any programs you have with ease by adding them to the SendTo menu. You know, when you right click on a file and choose Send To.
To do this, go to Start->Run and type in sendto to open up the SendTo folder. Now go to My Computer->C: Drive->Program Files and open up any of the program folders you want. Then right click on the individual programs and drag it to the SendTo folder and choose Create Shortcuts Here. Do that for each program you want to be listed there. The next time you right click on a file and choose Send To, you should see those programs listed there.
Disable Personalized Menus
Some XP users might not like the personalized menus that XP has. One example of this feature is the highlighting of newly installed programs in the Start Menu. Some users might find this annoying. To turn this feature off right click on the Start Button->Properties->Start Menu tab->Customize->Advance tab->uncheck Highlight newly installed programs. Click OK. Now when new programs are installed they shouldn't be highlighted.
Using XP System Restore
One important feature in XP is System Restore. This makes a backup of your data. To create the restore points go to Start->All Programs->Accessories->System Tools->System Restore. Click Create a restore point and click Next. Type in a description for the restore point and click Create.
You're all set. If your system fails for some reason you may use the restore point by hitting the F8 key repeatedly during boot time until a menu comes up. Choose Last known good configuration. This will restore everything to the last time when everything was working ok. It's using the most recent restore point that you created. If you can get into Windows XP, you can go to Start->All Programs->Accessories->System Tools->System Restore.
Clear System Restore Points
System restore points can take up a huge amount of space due to the many restore points created. You can delete all these restore points by right clicking on My Computer->Properties->System Restore and check Turn off System Restore on all drives.
Then make sure to create them again manually for each drive using the method above (Using XP System Restore). That will get rid of the older restore points and leave you with the new and updated one.
Disable/Remove Hibernation Mode
The hibernation file which allows a user to use hibernation mode takes up a lot of space. If you use this feature you are allocating/creating space so that when you come back everything (programs and folders) are still open. If you don't use it that much then there's not much sense keeping it. So you may remove it.
Go to Start->Control Panel->Power Options->Hibernate tab and uncheck Enable hibernation. That should remove the actual hibernation file. You may double check by doing a Search (F3 key) and search for hiberfil.sys in the C: drive. It shouldn't be found, but if it is, you may safely delete it.
Disable Indexing Service
Speed up XP by turning off the Indexing Service for your hard drive. This feature is used to make your searching needs faster, but it's affecting the overall performance so it's best to turn it off.
Go to My Computer and right click on the drive that you want the feature to be disabled. Choose Properties and uncheck the box where it says Allow Indexing Service to index this disk for fast file searching. When a box come up choose to Apply to all folders and subfolders.
Rename Multiple Files
This is something new in Windows XP - renaming multiple files. Let's say you have a huge photo collection and want to name them in sequential order. You can do this very easily.
Just select all the photos you want to rename (you may use the ctrl key and click on individual files if desired). Then hit the F2 key and type in the name of the file. Hit Enter. It should all rename. So if you entered VacationPhoto, you will have VacationPhoto (1), VacationPhoto (2), VacationPhoto (3), etc.
Reinstall Windows XP Without Repeating Online Activation
This has probably happened to most of us already. We have XP installed already and when we reinstall it, we are asked to go online and activate it again. You can avoid doing that by backing up a very small file that has the activation information.
Before you do this, keep in mind that your hardware should be the same as before when you activated in order for this to definitely work. Go to C:\Windows\System32 and look for wpa.dbl. Copy that file to a floppy. After you finished reinstalling XP, just rename the current wpa.dbl file in C:\Windows\System32 to something like wpa.old.
July 14, 2009
Manage iTunes 8

I have brought to you all some settings and functionalities you may access in iTunes 8 released by Apple. I hope you will be benefitted
- Organize your playlists in folders by clicking File >New Playlist Folder, thereafter drag playlists into each one.
| |
| |


- Create a playlist of an entire album by clicking Music in the Library menu at left, and thereafter View > Show Browser. Thereafter drag the album from the Album list to the space beneath everything else in the bluish pane at or just Shift-click the Add (+) button on the album name to do the same thing.
- Create an instant playlist of a group of selected songs by Ctrl-clicking each song, and thereafter drag the whole batch to the same space on the left.
- Right-click a song name to see a group of useful shortcuts, including the ability to display all the playlists in which a song currently appears, or cue it as the next song in Shuffle mode.
Navigate iTunes like a pro.
- Lost your place in the Library view while listening to a song? Then jump to the currently playing track by a click to the curved arrow to the right of the progress bar at the top.
| |
| |
![clip_image002[4]](https://blogger.googleusercontent.com/img/b/R29vZ2xl/AVvXsEhGA3w5toNNoAEM55E6ZwtvqILVcUZKfMQSVdHuuKnRmXnR4a9pgyfUtamm4wPgZyKHvoPtuThE-enOzDAmp2VgbrCODFpMg8JsaXgCqPxZB4YKA8Zauk2yJ0HJ_X2Oq1nWeO57XPeWSWk-/s1600-h/clip_image002%5B4%5D%5B2%5D.gif "clip_image002[4]")
![clip_image003[4]](https://blogger.googleusercontent.com/img/b/R29vZ2xl/AVvXsEj1pe__I8QNhSNN4xBgiPlibD3ivsFv5sg-K2TaDQC3CXTRSY49VlI2ul_qxBjg2y0xsDsCmXJudnpl2-dCW71lpNUhmvmzuGWeIZRX9dbnkeRUmYfvtJLnqBW416VXMlM_H9IcA4pUtFbf/s1600-h/clip_image003%5B4%5D%5B12%5D.jpg "clip_image003[4]")
- Right-click any column heading in order to change which ones are visible.
- Work the iTunes controls from the keyboard by holding down the Ctrl key: Ctrl-Right Arrow skips to the next song, while Ctrl-Left Arrow skips back. Ctrl-Up and Ctrl-Down change the volume, while the space bar plays or pause the current track.
Delete duplicate songs. Now that Apple is finally pulling DRM off its iTunes Store tracks, 30-cent upgrades are available for prior purchases, and, thrown into the bargain, the upgrades double the bit rate—to much-better-sounding 256-kilobit-per-second AAC files. Although iTunes offers to delete the old 128-Kbps files in the process, I found that iTunes misses a lot of them—seemingly because the iTunes Store changed the name of albums along the way. So knock them all out in one fell swoop by selecting File > Show Duplicates, and thereafter deleting all the unwanted versions.
Beef up artist recommendations. iTunes 8's new Genius feature is pretty cool, but take it a step further and install the free iLike Sidebar. It attaches to the right of your iTunes window and generates new recommendations, free MP3 links, and even related videos as you play different tracks.
| |
| |
![clip_image002[6]](https://blogger.googleusercontent.com/img/b/R29vZ2xl/AVvXsEjw6a_z2XMhsRMuA3h0VR3Uo5bzu42bX-Q3m2hfZVmtZSEuDVTp8GSiaT_RKgjAoy2JFzRQkq25sNEgcXGnxT47YVHycHG6pFAtjDDfusjSauOPxmXI1UrnHT0huLRvn6xX_t-0SG0b78pO/s1600-h/clip_image002%5B6%5D%5B2%5D.gif "clip_image002[6]")
![clip_image003[6]](https://blogger.googleusercontent.com/img/b/R29vZ2xl/AVvXsEjLqakvXLRfyqwerJ13xRx-d4_P9OFn9jkJVb8hIOPCKpJnSvLdVAay039JmUK7uUAFXfrH5CYaXdSjWNXg4b5Z9crSnV9BiAv8sOULzl_BF9nQKbrmkW1RpHX6RlpwQeTBl-Zhcpjo24Wz/s1600-h/clip_image003%5B6%5D%5B8%5D.jpg "clip_image003[6]")
Create extra libraries. Apple wants you to keep all of your music in one library, but that doesn't mean you have to. Hold down the Shift key when starting up the app; you'll see a small dialog box asking whether you want to create a new library or look for an existing one. This little trick lets you archive music you don't feel like staring at all the time but don't want to delete forever, either—and it's also great for people with different musical tastes who share the same computer.
Improve the sound quality of imported CDs. Now that storage prices have fallen through the floor, and the standard iPod classic has a 120GB hard disk, consider bumping up the sound quality of imported CD tracks to at least 256 Kbps AAC, if not Apple Lossless..
Source[ PC MAG]
July 4, 2009
VLC Media Player: Tips And Tricks

VLC 0.9 has released to widespread acclaim. The media player of choice for many, has packed in a horde of new features and marked changes in the design and interface. The playback bar has jazzed up buttons, which won’t appeal to those who went for the minimalist charm of VLC. They have also inverted the direction in which the scroll works with the media, you scroll down to go backward, and scroll up to go forward which is counterintuitive to everyone and irritating to the long term users.
Adjust The Colour Of The Video
In the playback bar, click on the icon that looks like the equaliser for lesser media players. This is right next to the playback button.
Then select the ‘video effects’ tab. The ‘basic’ tab will be selected by default. Check the ‘image adjust’ checkbox. From here, you can adjust the hue, saturation, contrast, brightness and gamma of the image. There is also a ‘brightness threshold’ slider.
Use VLC As A Transcoder
Open a file, then Navigate: Media > Convert/Save. In the file tab, click on the Convert/Save button.
Select the ‘File’ checkbox under ‘Outputs’. Enter a file name. Make sure that draw raw input is unchecked.
Then select an encapsulation, that is basically the format under ‘profile’.
Select a video codec and audio codec under the ‘Video codec’ and ‘Audio codec’ tabs.
You can save files in a format to be played on a portable media device and save.
Listen To Online Radio
To listen to online radio, Navigate: Playlist > Shoutcast Radio Listings.
Then Navigate: Playlist > Show Playlist. The Shoutcast radio option should have appeared below the ‘Playlist’ and ‘Media Library’ options. A long list of genres and radio stations will appear. Select one that you want to listen to you. Some of the stations listed don’t work, and some might make the player crash. Some stations are listed under multiple genres.
Skins
VLC supports skins. VLC skins can be downloaded from their site, but VLC also supports winamp 2 and xmps skins. Navigate: Tools > Preferences. In ‘Interface’, select the ‘Skins’ radio button and load the skin file from here.
Prevent Screensaver Interruption
This is a highly useful feature that prevents a screensaver from interrupting the movie you are watching.
Navigate: Tools > Preferences. In the dialogue that pop-up, look at the bottom left corner, and select the ‘All’ radio button under ‘Show settings’. Click on ‘Video’ preferences, and under ‘General Video Settings’ look for the ‘Disable Screensaver’ checkbox.
Overlay A Logo On The Video
Navigate: Tools > Preferences. Select ‘All’ under ‘Show Settings”
Navigate: Video > Subtitles / OSD > Overlays.
Click on ‘Logo Subfilter’ under Sub Picture Filter Module. Enter the path and filename in the bar below.
To do this via command line, Navigate: Tools > Add Interface > Command Line.
To Resume Playback From A Specific Time
If you were interrupted while watching a video or a movie, and want to resume from the exact moment you left off, there are two ways to do it.
While playing the movie, Navigate: Playback > Navigate: specific time, and enter the time in dialogue that pops up.
The other way to do this is to Navigate: Media > Advanced open file, check ‘Show more options’ and enter the Start Time.
Using The Loop Function
VLC can loop a part of a song or a video over and over again. To use this feature, Navigate: Tools > Advanced controls.
The loop button should appear on the playback bar. Open the file you want to play, click the button when you come to the part on the media you want to start the loop at. Click on the button again at the part of the file you want the loop to end. VLC will now start playing that portion of a file in an endless loop till you click on the loop button again to stop the loop.
Take Snapshots Of The Video
Navigate: Tools > Preferences > Video. Under video snapshots, enter the directory, a prefix, check ‘sequential numbering’ and choose a format. The default is .png.
To take the snapshot while the video is playing, Navigate: Video > Snapshot.
Through keyboard [Shift] + [S].
To use a button to take a snapshot, Navigate: Tools > Advanced Controls. The snapshot button appears on the playback bar.
Add A Ticker To The Video
Navigate: Tools > Preferences, select ‘All’ under ‘Show Settings’
Navigate: Video > Subtitles/OSD > Marquee. Enter the text in the marquee, and the text will scroll across the screen while the video is playing.
You can also ste the settings to get an RSS feed to scroll across the video. Copy the feed URL then Navigate: Tools > Preferences, select ‘all’ under ‘show settings;
Navigate: Video > Subtitles/OSD tick on “RSS and Atom feed display’ and enter the URL in the bar.
There is an option to display or not display images in the feeds.
June 30, 2009
Vista Sidebar 2.5 | Download

Vista sidebar for Windows XP and Vista has Utilities like media players, Google search, yahoo search and lots of more search engines. It has also gadgets like weather and system uptime and many more.
The sidebar uses 49% less RAM and is quicker than the original Microsoft Sidebar with more extras and works on Microsoft Windows Vista and XP. Thoosje´s Vista Sidebar is also part of the Vista Transformation Pack that turns your XP OS into Windows Vista.
This new versions runs stable and small bugs have been resolved
Download it from Here
You can get many utilities in the Publisher’s website Thoosje´s site
June 28, 2009
McAfee Avert Stinger

McAfee AVERT Stinger is a stand-alone utility used to detect and remove specific viruses. It is not a substitute for full anti-virus protection, but rather a tool to assist administrators and users when dealing with an infected system. Stinger utilizes next generation scan engine technology, including process scanning, digitally signed DAT files, and scan performance optimizations.
You can download it form the Publishers Site or directly from the following link “McAfee Avert Stinger”
June 27, 2009
Blogger Tips & Tricks

Adding widgets to blogger plays a Great role in optimizing Blogger Blogs. These are done by hacking the blogger template code snippets. Perhaps, not the experts, but the beginners in blogging must be wondering about "moving any bar", adding "recent comment" widget, adding "recent posts" etc. These modifications can also done by any beginner in blogging world.
I am happy to share a great site I found which have all this hacks/techniques to bring about significant changes assembled together. Now, you don't have to surf crazily to get those widgets installed on your blogger blogs.
Some of the Tips and Tricks are as follows
1. Expandable Posts or Read More Hack
2. Recent Posts Widget
3. Recent Comment Widget
4. Top Commentators Widget
5. Remove Label Post Count
6. Add Page Element to Header and Blog Posts
7. Sticky Posts in Blogger
8. Add Images or Icons to Sidebar Links
9. Remove NavBar in Blogger
10. Add Scrollbars to Blog Widgets
11. Add Favicon to Blogger URL
12. Simple Search Widget
13. Wrap Adsense Ads in Post Body
14. Special Effects for Peekaboo Posts
15. Page Navigation Hack for Blogger.......
More are there with detailed explanations in the site below:
50 Amazing Blogger Tricks & Hacks


 Posts
Posts



